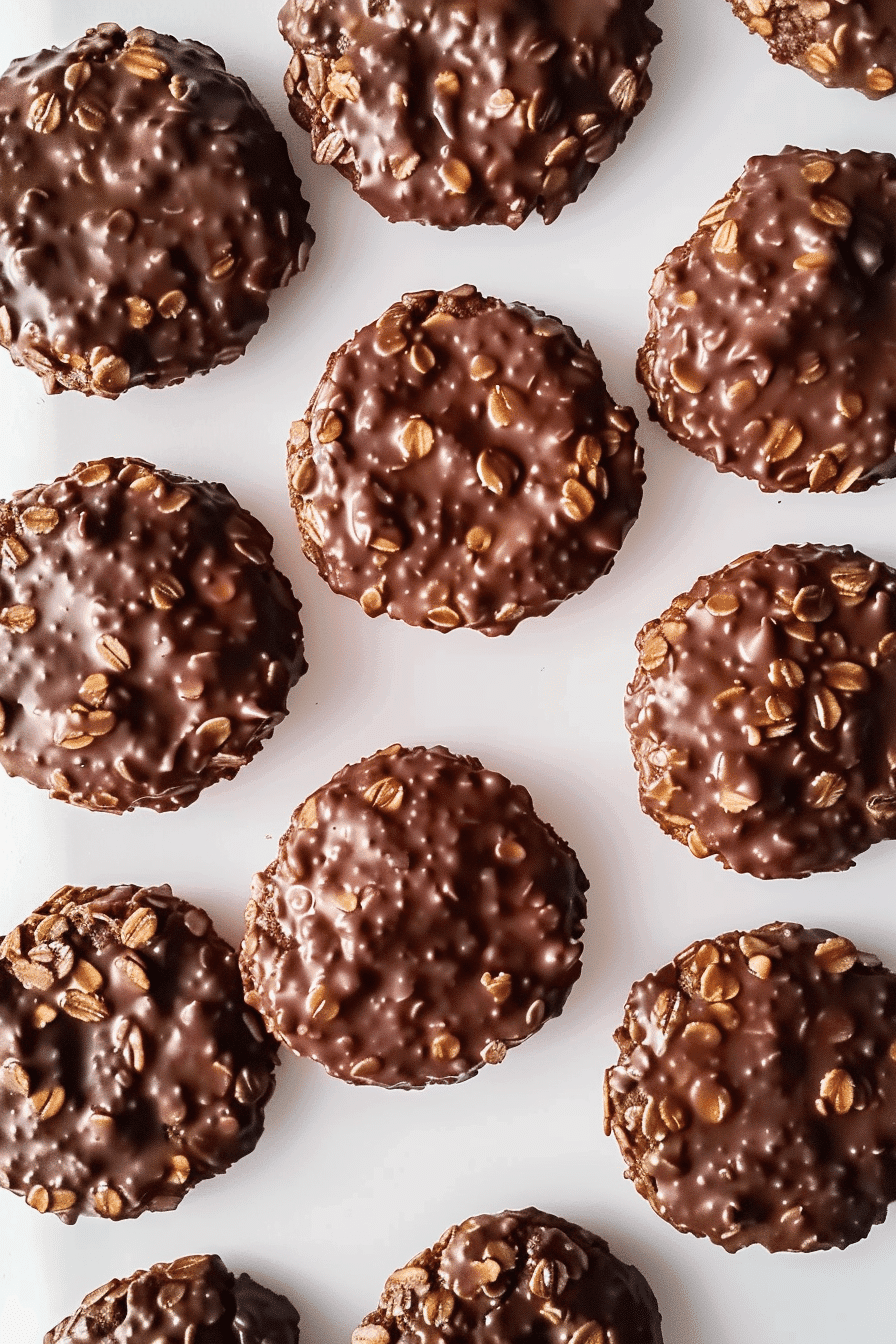
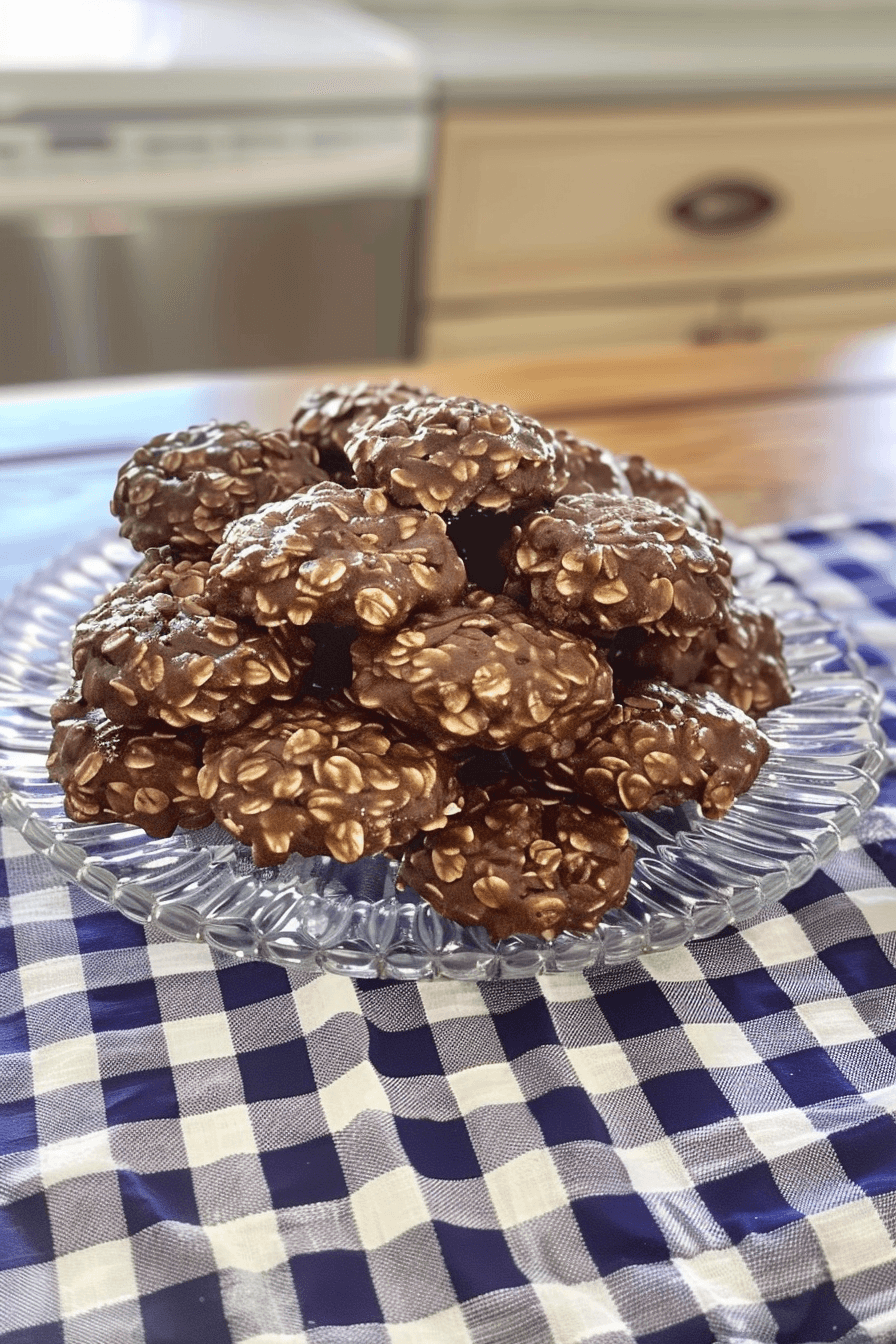
My mom Donna Thompson never called them “original” chocolate oatmeal no bake cookies. To her, they were just “cookies” – the ones she’d whip up whenever we needed something sweet without heating up the kitchen. But after years of experimenting with dozens of variations, I’ve come to appreciate that this simple combination of chocolate, oats, and peanut butter is truly the foundation that every other no-bake cookie builds upon.
These aren’t just cookies – they’re the blueprint. The template. The recipe that launched a thousand variations and satisfied countless sweet cravings since someone first figured out you could make amazing cookies without ever turning on an oven.
If you’ve never made no-bake cookies before, start here. If you’ve made them a hundred times but they never quite turn out right, this is your reset button. These original chocolate oatmeal no bake cookies are about to become your most reliable kitchen companion.

Table of Contents
Why These Original Cookies Matter
The Foundation of All No-Bake Success
Here’s what makes this recipe so special – it’s not trying to be fancy or reinvent anything. It’s pure, straightforward perfection that’s been working for generations. The combination of butter, sugar, cocoa, and milk creates this perfect chocolate base that binds everything together. Add oats for texture, peanut butter for richness, and vanilla for depth. That’s it.
But don’t let the simplicity fool you. Getting these original chocolate oatmeal no bake cookies exactly right requires understanding a few key principles that most people skip right over. The temperature matters. The timing matters. Even the order you add ingredients matters.
I’ve learned this through making literally hundreds of batches over the years. Some for school fundraisers, some for Emma’s sleepovers, some just because we were out of store-bought cookies and needed something sweet right now. Through all those batches, I’ve figured out exactly what makes the difference between cookies that set up perfectly and ones that stay mushy or turn into chocolate gravel.
What Makes This Version Perfect Every Time
The beauty of the original chocolate oatmeal no bake cookie recipe is that it’s completely foolproof – if you follow the method exactly. The problem is, most people treat it like a casual recipe where “close enough” works fine. It doesn’t.
These cookies are basically candy-making disguised as cookie-making. That mixture of sugar, butter, cocoa, and milk? You’re essentially making chocolate fudge that you then stretch with oats and peanut butter. Understanding this changes everything about how you approach the recipe.
When you nail the technique, these cookies have this incredible fudgy-chewy texture that’s completely addictive. They’re rich enough to satisfy any chocolate craving, but the oats make them feel substantial and satisfying rather than just sugary.

Original Chocolate Oatmeal No Bake Cookies
Equipment
- Large heavy-bottomed saucepan
- Candy thermometer optional
- wooden spoon
- Cookie Scoop
- Parchment Paper
- baking sheets
Ingredients
- 2 cups granulated sugar don't substitute with brown sugar for original recipe
- 1/2 cup unsalted butter cut into pieces for even melting
- 1/2 cup whole milk 2% milk works too, avoid skim
- 1/4 cup unsweetened cocoa powder natural cocoa powder, not Dutch-processed
- 1/2 cup creamy peanut butter Jif or Skippy work best – avoid natural for this recipe
- 1 teaspoon vanilla extract
- 3 cups quick-cooking oats essential – don't use old-fashioned oats
Instructions
Line baking sheets with parchment paper.
In large saucepan, combine sugar, butter, milk, and cocoa over medium heat.
Stir constantly until mixture reaches full rolling boil (bubbles across entire surface).
Boil exactly 90 seconds, stirring constantly (230°F on candy thermometer).
Remove from heat immediately. Stir in vanilla, then peanut butter until smooth.
Fold in oats until evenly coated.
Drop spoonfuls onto parchment; let cool 20 minutes until set.
Notes
– Timing is critical – exactly 90 seconds at rolling boil for perfect texture
– Use candy thermometer if possible – aim for 230°F (soft ball stage)
– Quick oats are essential – old-fashioned oats won’t work the same
– Have all ingredients measured before starting – this moves fast!
– Cookies get even better overnight as flavors develop Troubleshooting:
– Too dry/crumbly: over-boiled the mixture
– Won’t set/too gooey: didn’t boil long enough or hot enough
– Grainy texture: didn’t stir constantly during boiling Storage:
– Room temperature in airtight container up to 1 week
– Can be frozen for up to 3 months
– Actually taste better the next day!
Nutrition
Mastering the Original Chocolate Oatmeal Method
The Ingredients That Define Perfection
Let’s talk about why each ingredient in this original recipe matters, because understanding the “why” makes you a better cookie maker.
Granulated sugar creates the structure. When you heat it with liquid, it forms the syrup that binds everything together. Don’t try to substitute brown sugar or other sweeteners in this original version – granulated sugar reaches the exact consistency these cookies need.
Unsweetened cocoa powder gives you that deep chocolate flavor without adding extra fat or moisture that could throw off the texture. I always use natural cocoa powder rather than Dutch-processed for this recipe – it has more acidity that balances the sweetness perfectly.
Butter and milk work together to create the creamy base that carries all the flavors. Whole milk gives the best results, but 2% works fine too. Don’t use skim milk – you need that fat content for proper texture.
Quick-cooking oats are absolutely essential. Old-fashioned oats are too tough and won’t absorb the chocolate mixture properly. Quick oats give you that perfect tender bite that makes these cookies irresistible.
Creamy peanut butter adds richness and helps bind everything together. I prefer regular grocery store peanut butter like Jif or Skippy over natural versions for this recipe – the added stabilizers actually help the cookies set better.
The Critical Temperature and Timing
Now here’s where most people go wrong with original chocolate oatmeal no bake cookies – they don’t pay attention to temperature and timing. This isn’t a forgiving recipe where you can wing it and hope for the best.
In your large saucepan, combine 2 cups granulated sugar, 1/2 cup butter, 1/2 cup milk, and 1/4 cup cocoa powder. Cook over medium heat, stirring constantly, until the mixture comes to a full rolling boil.
Here’s the critical part: once you see bubbles covering the entire surface (not just around the edges), start timing. Boil for exactly 90 seconds while stirring constantly. If you have a candy thermometer, you’re aiming for 230°F – that’s the soft ball stage, and it’s what makes these cookies set up perfectly.
Remove from heat immediately when time is up. The mixture will be extremely hot and continue cooking if you leave it on the burner.
Step-by-Step Original Cookie Success
Getting Your Chocolate Base Right
Start by having everything measured and ready – this process moves fast once you start cooking. Line your baking sheets with parchment paper and have your cookie scoop ready.
Combine your sugar, butter, milk, and cocoa in the saucepan over medium heat. Stir constantly as it heats – you don’t want the cocoa to clump or the mixture to scorch on the bottom.
When the mixture starts bubbling around the edges, keep stirring and watch carefully. You’re waiting for a full rolling boil where bubbles cover the entire surface. This might take 5-7 minutes depending on your stove.
Once you hit that rolling boil, set your timer for 90 seconds and keep stirring. The mixture will get thicker and glossier as it cooks. When the timer goes off, immediately remove from heat.
Adding the Magic Ingredients
This is where the original recipe really shines – the order matters here. First, stir in 1 teaspoon of vanilla extract while the mixture is still hot. It’ll bubble up and smell amazing.
Next, add 1/2 cup of creamy peanut butter and stir until it’s completely melted and smooth. The hot chocolate mixture will melt the peanut butter instantly, creating this glossy, fudgy base.
Finally, fold in 3 cups of quick-cooking oats. Don’t just dump them in – fold them gently until every oat is coated with the chocolate mixture. The mixture should look rich and glossy, with no dry oats visible.
Working quickly (because the mixture starts to set as it cools), drop spoonfuls onto your parchment-lined baking sheets. I use a medium cookie scoop for consistent sizing, but two spoons work fine too.
When Original Cookies Go Wrong
The Most Common Mistakes and Easy Fixes
Let me save you some frustration by sharing the most common issues I see with original chocolate oatmeal no bake cookies, and how to fix them.
Problem: Cookies won’t set and stay gooey This happens when the mixture didn’t get hot enough or didn’t boil long enough. Make sure you’re seeing bubbles across the entire surface, not just around the edges. If you’re at high altitude, you might need to boil for an extra 15-30 seconds.
Problem: Cookies are dry and crumbly This is usually from over-boiling. The mixture got too hot and turned more into hard candy than fudge. Keep your heat at medium (not medium-high) and stick to that 90-second timing religiously.
Problem: Cookies are too sweet Sometimes people accidentally add extra sugar or don’t measure the cocoa correctly. This original recipe has the perfect balance, so make sure you’re measuring accurately – especially the cocoa powder.
Smart Variations on the Original
Once you’ve mastered the basic original chocolate oatmeal no bake cookies, there are some simple variations that work beautifully with this base method.
My neighbor swears by adding 1/2 cup of chopped toasted nuts along with the oats – pecans or walnuts work great. The nuts add this amazing crunch that contrasts perfectly with the fudgy texture.
For holidays, I sometimes add 1/4 cup of mini chocolate chips with the oats. They don’t melt completely in the mixture, so you get these little bursts of extra chocolate in every bite.
Emma’s favorite variation is what she calls “Coconut Paradise” – I add 1/3 cup of unsweetened shredded coconut along with the oats. The coconut gets slightly toasted from the hot mixture and adds this subtle tropical flavor that shouldn’t work but absolutely does.
Pro Tips for Perfect Original Cookies
Storage and Serving Secrets
Original chocolate oatmeal no bake cookies actually get better after sitting overnight. Something about the oats continuing to absorb the chocolate mixture makes them more tender and flavorful the next day.
Store them in an airtight container at room temperature for up to a week. They’re perfect at room temperature, but I have to admit they’re pretty amazing chilled too – the texture becomes more fudge-like and they’re incredibly refreshing on hot days.
For gift-giving or parties, these cookies travel beautifully. Layer them between sheets of parchment in a tin or container, and they’ll stay perfect for days. Just don’t stack them too high or the bottom ones might get squished.
Making Them Look Bakery-Perfect
Want your original cookies to look more polished? Right after you drop them onto the parchment, use the back of a spoon to gently smooth the tops and create neat, round shapes. The mixture is still soft enough to shape but firm enough to hold the pattern.
For special occasions, I sometimes drizzle melted white chocolate over the cooled cookies in a zigzag pattern. It adds this elegant touch that makes people think you spent way more time on them than you actually did.

The Timeless Appeal
What I love most about these original chocolate oatmeal no bake cookies is how they connect us to generations of home cooks who understood that sometimes the simplest things are the most satisfying. This recipe has been passed down through families, shared between neighbors, and saved countless situations when someone needed a quick dessert.
There’s something deeply comforting about making a recipe that your grandmother probably made, that your kids will probably make for their kids someday. In a world of complicated desserts and trendy ingredients, these cookies remind us that sometimes all you need is chocolate, oats, and a little know-how.
Every time I make these, I think about all the hands that have stirred this same mixture, all the kitchens that have filled with that amazing chocolate aroma, all the families that have gathered around platters of these humble but perfect cookies. The techniques I’ve shared here are what I’ve learned through my own complete guide to classic no-bake cookies – tips gathered from years of making every variation imaginable, but always coming back to this original as the gold standard.
Whether you’re making these for the first time or the hundredth time, I hope you taste that perfect balance of chocolate, peanut butter, and oats that makes these cookies so endlessly appealing. They’re not fancy, but they’re absolutely perfect exactly as they are. If you’re looking for more recipe variations, I share new ideas regularly on Pinterest, and I’m always happy to help troubleshoot any cookie questions over on Facebook.
Your Original Cookie Questions Answered
Why do some recipes use different amounts of ingredients?
Great question! The original recipe proportions I use are based on years of testing what gives the most consistent results. Some recipes use more or less of various ingredients, but these proportions create the perfect balance of fudgy and chewy.
Can I use old-fashioned oats instead of quick oats?
I really don’t recommend it for the original recipe. Old-fashioned oats don’t absorb the mixture as well and can make the cookies tough. If that’s all you have, pulse them in a food processor a few times to break them down closer to quick oat size.
What if I don’t have a candy thermometer?
The 90-second timing method works great if you’re careful about recognizing a full rolling boil. Look for bubbles covering the entire surface, not just around the edges. The mixture should look thick and glossy when it’s ready.
How do I know if my mixture is the right consistency?
When you lift your spoon, the mixture should fall in a ribbon that holds its shape for a moment before disappearing back into the mixture. If it’s too thin, it needed more cooking time. If it’s too thick, you may have overcooked it.
Can I double this recipe?
Absolutely! Just use a larger saucepan and be extra careful about timing. Larger batches can take slightly longer to reach the right temperature, so watch your thermometer closely.


Delicious! Really appreciated the detailed instructions 😊
Will be making these again.