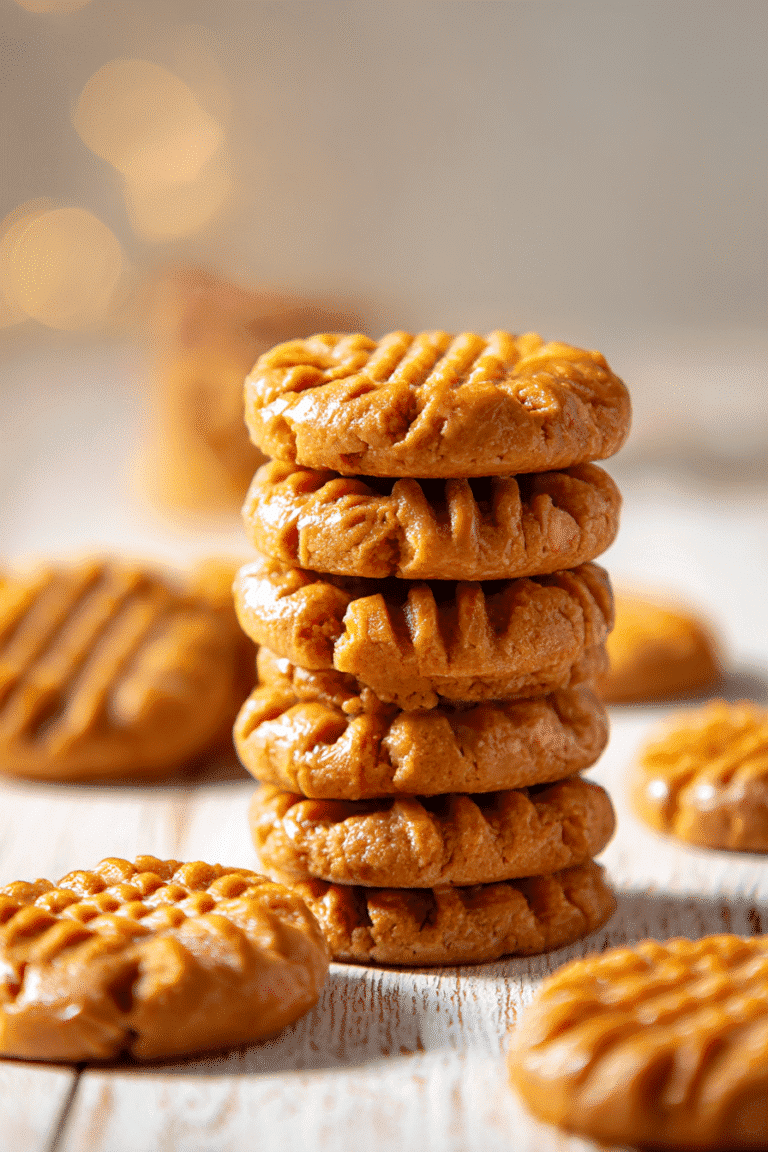
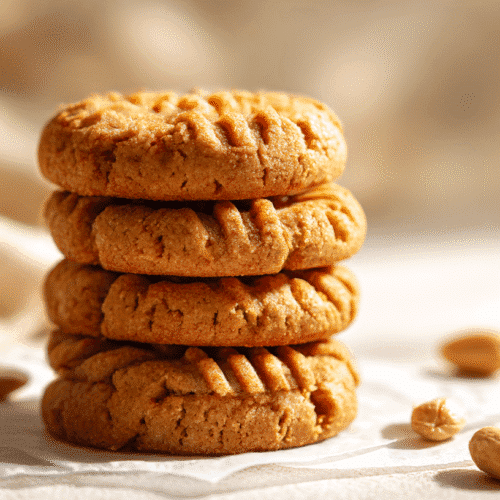
So there I was, 9:47 PM on a rainy Tuesday, frantically digging through my mom’s old recipe box. My neighbor’s kid had been begging for “those cafeteria cookies” all week – you know, the ones wrapped in plastic that somehow made elementary school lunch tolerable. And honestly? I hadn’t made old-fashioned no bake peanut butter cookies in about fifteen years.
Here’s the thing nobody tells you about these legendary treats: they’re not just nostalgic comfort food. They’re actually genius. No oven required, pantry ingredients only, and that perfect chewy-but-set texture that commercial bakeries spend millions trying to replicate. My grandmother’s generation knew what they were doing when they perfected this recipe during the Depression era.
But here’s where it gets interesting – most online recipes mess up the crucial details that separate cafeteria-quality perfection from disappointing mush. After testing batch after batch (my kitchen looked like a peanut butter explosion), I’ve cracked the code on what makes these old-fashioned no bake peanut butter cookies actually set up properly and stay soft for days.
If you’re just getting started with no bake treats, check out our complete guide to classic no bake cookie recipes for foolproof techniques that work every time.
Ready to discover why this vintage recipe has survived for generations? Let’s dive into the real story behind these incredible treats.

Table of Contents
Old-Fashioned No Bake Peanut Butter Cookies – The Real Story Behind These Treats
Why No Bake Cookies Changed Everything for Home Cooks
You know what’s crazy? No bake cookies weren’t just a convenience invention – they were born out of pure necessity. During the 1930s and 1940s, when families were pinching every penny and rationing was the norm, creative home cooks discovered they could make incredible treats without using precious oven fuel or heating up the house during sweltering summers.
My neighbor Karen (who’s 87 and still makes these every Christmas) told me her mother learned this technique from a cafeteria worker in 1943. “Nobody had air conditioning back then,” she laughed. “Making cookies without turning on that oven was like having superpowers.”
What Makes Old-Fashioned No Bake Cookies Actually Work
Here’s the science that’ll blow your mind: these cookies work because of something called “soft ball stage” – that magical temperature where sugar syrup hits exactly 234-240°F. Most people skip this step or don’t boil long enough, which is why their cookies never set properly.
But the genius of the old-fashioned version? They didn’t need fancy thermometers. They just knew to wait for that “roaring boil” that couldn’t be stirred down, then count to exactly 90 seconds. That timing creates the perfect sugar base that’ll hold everything together without turning into concrete.
I learned the hard way that modern quick oats behave differently than the old-fashioned rolled oats our grandmothers used. The texture difference is subtle but crucial for that authentic cafeteria-style chew.
Making Perfect Old-Fashioned No Bake Peanut Butter Cookies – My Foolproof Method
The Pantry Ingredients That Actually Matter
After ruining three batches with “healthy substitutions,” I finally accepted the truth: this recipe demands specific ingredients for a reason. You need real butter (not margarine), whole milk (not skim), and granulated sugar (not coconut sugar). Trust me on this one.
For peanut butter, stick with the classics like Jif or Skippy. I know, I know – we’re all about natural everything these days. But natural peanut butter has inconsistent oil content and lacks the stabilizers that help these cookies set up properly. Save the fancy stuff for sandwiches.
The secret ingredient nobody mentions? A tiny pinch of cream of tartar. My great-aunt swore by this trick – it helps prevent the sugar from crystallizing and gives you that perfectly smooth, creamy texture. You’ll find it near the spices, and a little container lasts forever.
Equipment Secrets My Grandmother Never Told Me
Okay, so about that saucepan situation. You absolutely need a heavy-bottomed pan – preferably 3-quart minimum. I tried making these in a lightweight pan once, and the bottom scorched before the mixture even started bubbling properly.
Here’s what nobody prepares you for: you’ll be stirring constantly for about 4 minutes straight. Your arm will get tired. Use a sturdy wooden spoon or silicone spatula that won’t melt if it touches the hot pan sides.
And please, for the love of all things sweet, line your workspace with parchment paper BEFORE you start cooking. Once that hot mixture comes off the stove, you have maybe 2 minutes to scoop everything before it starts setting up. Don’t be the person frantically searching for wax paper while your perfect batch turns into one giant cookie blob.

Old-Fashioned No Bake Peanut Butter Cookies Recipe
Equipment
- 1 Heavy 3-quart saucepan Essential for even heating
- 1 Wooden spoon or silicone spatula For constant stirring
- 1 Candy thermometer Optional but recommended
- 2 Large baking sheets For parchment paper
- 1 Measuring cups set Dry and liquid
- 1 Measuring spoons For vanilla and salt
Ingredients
- 2 cups granulated sugar Do not substitute
- 1/2 cup whole milk Full-fat preferred
- 1/2 cup unsalted butter Room temperature
- 1 cup creamy peanut butter Jif or Skippy recommended
- 1 teaspoon vanilla extract Pure vanilla preferred
- 3 cups old-fashioned rolled oats Not quick oats
- 1 pinch salt Enhances flavor
- 1/4 teaspoon cream of tartar Optional, prevents crystallization
Instructions
Prep workspace: Line countertops or baking sheets with parchment paper. Measure all ingredients and have them ready – this recipe moves quickly once you start!
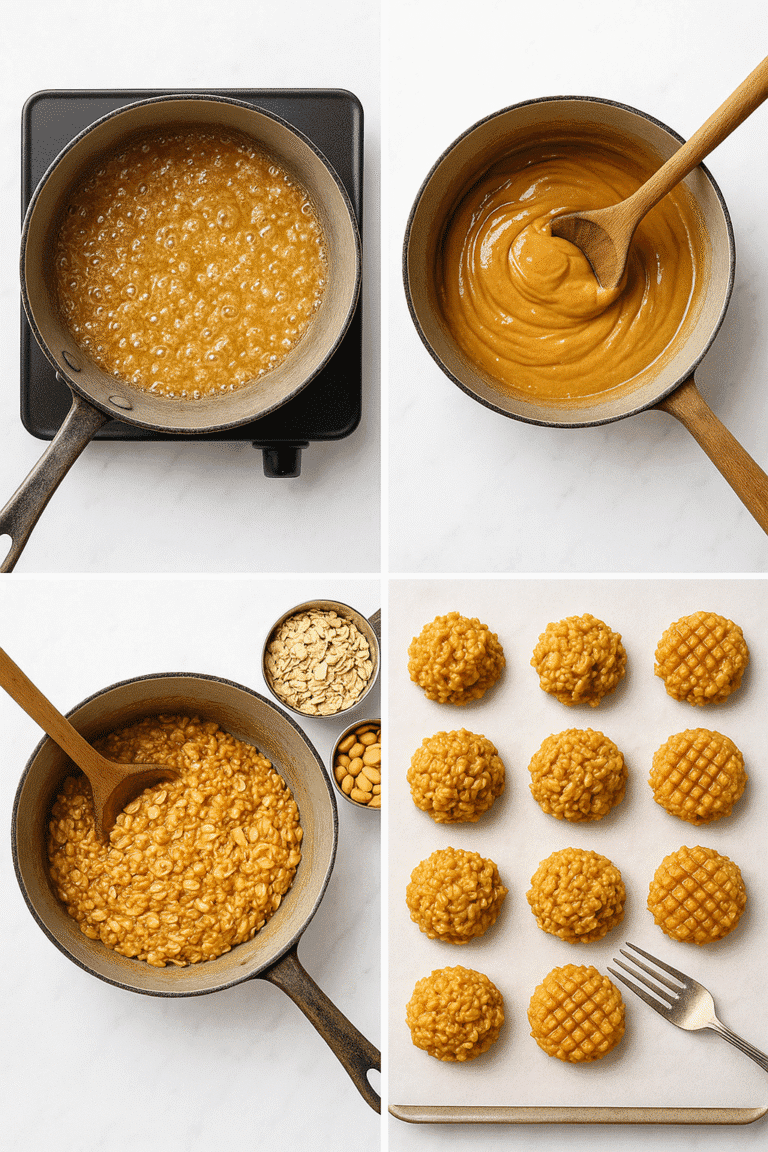
Create sugar base: In heavy 3-quart saucepan, combine granulated sugar, milk, and butter over medium heat. Stir constantly until butter completely melts and mixture is smooth.
Reach perfect boil: Bring mixture to a full, rolling boil where large bubbles cover entire surface and cannot be stirred down. Add cream of tartar if using. Set timer and boil for exactly 90 seconds, stirring constantly. (Temperature should reach 234°F if using thermometer.)
Add peanut butter: Remove from heat immediately. Quickly stir in peanut butter and vanilla extract until completely smooth and creamy, about 30 seconds of vigorous stirring.
Fold in oats: Add all oats and salt at once. Using wooden spoon, gently fold (don’t stir aggressively) until every oat is coated and mixture is well combined. Work quickly but carefully.
Shape cookies: Working fast, drop rounded spoonfuls of mixture onto prepared parchment paper. Size doesn’t need to be perfect – rustic is authentic! You have about 2 minutes before mixture starts setting.
Set and cool: Allow cookies to cool and set at room temperature for 30 minutes. Don’t refrigerate unless your kitchen is very warm. Cookies will firm up as they cool.
Serve and store: Enjoy immediately or store in airtight container at room temperature for up to one week. These actually improve in flavor after the first day!
Notes
Pro Tips for Perfect Results:
- Timing is everything: Don’t rush the boiling phase. A full 90-second rolling boil is crucial for proper setting.
- Use the right peanut butter: Natural peanut butter doesn’t work well due to oil separation and lack of stabilizers.
- Heavy pan matters: Lightweight pans cause scorching and uneven heating.
- Work quickly: Once off heat, you have about 2 minutes before mixture becomes too thick to drop.
Troubleshooting:
- Cookies won’t set: Mixture wasn’t boiled long enough. Start over – there’s no fix for this.
- Too hard/crumbly: Overboiled the sugar mixture. Next time, watch timing carefully.
- Grainy texture: Sugar crystallized. Use cream of tartar and avoid stirring during boiling.
Storage & Variations:
- Store covered at room temperature up to 1 week
- Freeze up to 3 months between parchment layers
- Add 1/2 cup mini chocolate chips for extra indulgence
- Roll in powdered sugar while warm for special occasions
- Try chopped toasted pecans for crunch
Make-Ahead Tips:
These are perfect for meal prep! Make a double batch and freeze half. They taste amazing straight from the freezer with a fudgy texture, or thaw at room temperature for the classic chewy consistency.Nutrition
Step-by-Step Old-Fashioned No Bake Peanut Butter Cookie Success
Getting Your Sugar Base Right
This is where the magic happens, and where most people mess up. In your heavy saucepan, combine 2 cups granulated sugar, ½ cup whole milk, and ½ cup butter. Start on medium heat – not high! – and stir constantly until the butter melts completely.
Now comes the crucial part: bring this mixture to a full, rolling boil. You’ll know it’s ready when the entire surface is covered in large bubbles that you literally cannot stir down. Set your timer for exactly 90 seconds and keep stirring. If you don’t hit that full boil for the complete time, your cookies won’t set. Period.
The mixture will foam up dramatically – don’t panic! This is normal and exactly what you want. You’ll hear it bubbling aggressively, and that’s your cue that the sugar is reaching the right temperature.
The Timing That Changes Everything
Here’s where years of trial and error taught me something crucial: the moment you remove that hot mixture from the burner, you’re racing against chemistry. Work quickly but don’t rush so much that you make mistakes.
Immediately stir in 1 cup of creamy peanut butter and 1 teaspoon vanilla extract. The residual heat will melt the peanut butter perfectly – you’ll see it transform from chunky blobs to silky smoothness in about 30 seconds of stirring.
Now add 3 cups of old-fashioned oats all at once. Here’s my secret: I use a large wooden spoon to fold (not stir) the oats in. This keeps them from breaking apart while ensuring every single oat gets coated with that luscious peanut butter mixture.

When Old-Fashioned No Bake Cookies Go Wrong (And How to Fix It)
Cookie Disasters I’ve Survived
Oh boy, let me tell you about the Great Cookie Catastrophe of 2019. I was feeling confident, maybe a little too confident, and decided to multitask while making these. Big mistake. I answered a phone call right as my sugar mixture hit the boiling point and forgot to start my timer.
The result? Cookies that never set up. They looked gorgeous for about 10 minutes, then slowly melted into sad, sticky puddles. My friend Sarah once tried to salvage a similar batch by putting them in the refrigerator. They firmed up, sure, but had this weird, grainy texture that no amount of milk could fix.
The fix? Unfortunately, there isn’t one. Undershooted sugar means starting over. But here’s the silver lining: that “failed” mixture makes incredible ice cream topping. Just saying.
No Bake Cookie Variations Worth Trying
Once you’ve mastered the basic technique, this recipe becomes your playground. My kids absolutely lose their minds for the version where I add ½ cup of mini chocolate chips right after the oats. The residual heat slightly melts them, creating these perfect little pockets of chocolate.
For special occasions, I’ll roll the finished cookies in powdered sugar or chopped toasted pecans while they’re still slightly warm. And last Christmas, I experimented with adding a tablespoon of cinnamon to the sugar mixture – it tasted like snickerdoodle heaven.
My cousin in Texas swears by her jalapeño version (yes, really), where she adds finely diced candied jalapeños. Sounds crazy, but that sweet-heat combo is absolutely addictive. If you love experimenting with flavors like this, join us on Pinterest for more creative inspiration!
Old-Fashioned No Bake Peanut Butter Cookies Like a Pro – Insider Secrets
Storage Tricks That Keep Them Perfect
Game changer alert: these cookies actually get BETTER after the first day. Something magical happens with the texture – the oats soften just slightly while maintaining that perfect chew. Store them in an airtight container at room temperature, and they’ll stay fresh for up to a week.
Here’s what surprised me: they freeze beautifully. Layer them between parchment paper in a freezer container, and they’ll keep for up to three months. The best part? You can eat them straight from the freezer – they have this amazing fudgy texture when frozen that’s completely different but equally delicious.
For parties or bake sales, I’ve discovered these transport like champions. Unlike delicate sugar cookies that crumble if you look at them wrong, these sturdy treats can handle being stacked, packed, and even shipped without falling apart.
Making No Bake Cookies Party-Ready
Last minute panic? Here’s what I do when I need impressive cookies in under 30 minutes. I make my standard batch, then while they’re still warm and pliable, I press them into mini cupcake liners. Instant individual servings that look like I spent hours on presentation.
For kids’ parties, I roll them into balls instead of dropping spoonfuls, then roll each ball in colored sprinkles before they set. The kids think I’m some kind of cookie wizard, and the adults appreciate that there’s no artificial food coloring.
Want to blow people’s minds? Make them sandwich-style. Drop half your batch in regular cookie shapes, then when they’re almost set, gently press a second warm cookie on top. You get these incredible double-decker treats that look bakery-professional but require zero actual baking skills.
Your New Go-To Cookie Recipe
And there you have it – the complete guide to making old-fashioned no bake peanut butter cookies that actually work. These aren’t just cookies; they’re edible time machines that transport you straight back to elementary school lunch rooms and grandmother’s kitchens.
The best part? Once you nail this technique, you’ll have a reliable treat that requires no special equipment, no precise oven temperatures, and no chilling time. Just real ingredients, a little patience during that crucial boiling phase, and the confidence that comes from understanding exactly why each step matters.
I can’t wait to hear how your batch turns out! And trust me, once word gets out that you’ve mastered this classic, you’ll become the go-to person for potlucks, bake sales, and those moments when someone desperately needs comfort food that tastes like childhood memories.
Check out our Facebook page for new and different recipes we share regularly!
Frequently Asked Questions
Can I use natural peanut butter instead?
Oh, this is a great question that I get asked constantly! While you technically can, I really don’t recommend it. Natural peanut butter has a different oil content and lacks the stabilizers that help these cookies set properly. You might end up with cookies that stay too soft or have an oily texture.
Why didn’t my cookies set up?
The most common culprit is not boiling the sugar mixture long enough. That mixture needs to hit a full, rolling boil for exactly 90 seconds. If you’re unsure, use a candy thermometer – you want it to reach 234°F. Also, make sure you’re using the exact measurements; this isn’t a recipe where you can wing it.
Can I make these gluten-free?
Absolutely! Just make sure your oats are certified gluten-free. The rest of the ingredients are naturally gluten-free, so it’s a super easy swap that doesn’t affect the taste or texture at all.
How long do they last?
These cookies stay fresh at room temperature for up to a week in an airtight container. They actually improve after the first day as the flavors meld together. You can also freeze them for up to three months.


1 thought on “Old-Fashioned No Bake Peanut Butter Cookies: The School Cafeteria Secret That Actually Works”