You know that moment when unexpected company’s coming and you need something festive right now? Last Tuesday, I found myself in exactly that situation. My sister texted at 4 PM: “Bringing the kids by in an hour!” And there I was, no cookies in sight.
But here’s the thing about growing up in the Thompson kitchen — mom Donna Thompson always had tricks up her sleeve. These no-bake cornflake wreaths were her go-to holiday lifesaver, and they’ve saved my bacon more times than I can count. Trust me, fifteen minutes later, I had the most adorable little Christmas wreaths cooling on the counter.
Now, before we dive in, let me tell you – if you’re looking for more no-bake cookie magic, you’ll want to check out our complete guide to classic no-bake cookie recipes. It’s packed with family favorites that’ll make your holiday season so much easier. But today? Today we’re talking about these little green gems that look way fancier than the five minutes of actual work they require.

Table of Contents
What Makes These No-Bake Cornflake Wreaths So Special
The Story Behind These Holiday Helpers
Between you and me, I used to think these cookies looked a little… well, weird. I mean, cornflakes? For Christmas cookies? But the first time I watched mom make them, something magical happened in our kitchen. She’d heat up that marshmallow mixture, add the green food coloring, and suddenly our whole house smelled like Christmas morning.
The real genius, though, was watching her work with the kids. My nephew Jake, who could barely reach the counter, was pressing those little red candies into perfect holly berry clusters. And my niece Emma? She was forming wreaths like she’d been doing it her whole six-year-old life.
Why These Actually Work (When Others Don’t)
Here’s what nobody tells you about no-bake Christmas cookies: most of them are either too sweet, too complicated, or they fall apart if you look at them wrong. These cornflake wreaths? They’re basically indestructible. The cornflakes give them this amazing crunch, the marshmallows hold everything together like edible glue, and those little red candies add just enough sweetness without making your teeth hurt.
I’ve served these at everything from school potlucks to fancy holiday parties, and they disappear every single time. Last Christmas, my neighbor Karen (who usually turns her nose up at “simple” desserts) asked for the recipe after her third cookie.

No-Bake Cornflake Wreaths
Equipment
- Large microwave-safe bowl
- baking sheets
- Wax paper or parchment paper
- Medium cookie scoop
- Measuring cups and spoons
- Mixing spoon
Ingredients
5 tablespoons butter
10 oz mini marshmallows (about 6 cups)
1 teaspoon green food coloring
1/2 teaspoon vanilla extract
6 cups cornflakes cereal
Mini red candies (M&Ms or Red Hots for decoration)
Instructions
Line baking sheets with wax paper or parchment paper.
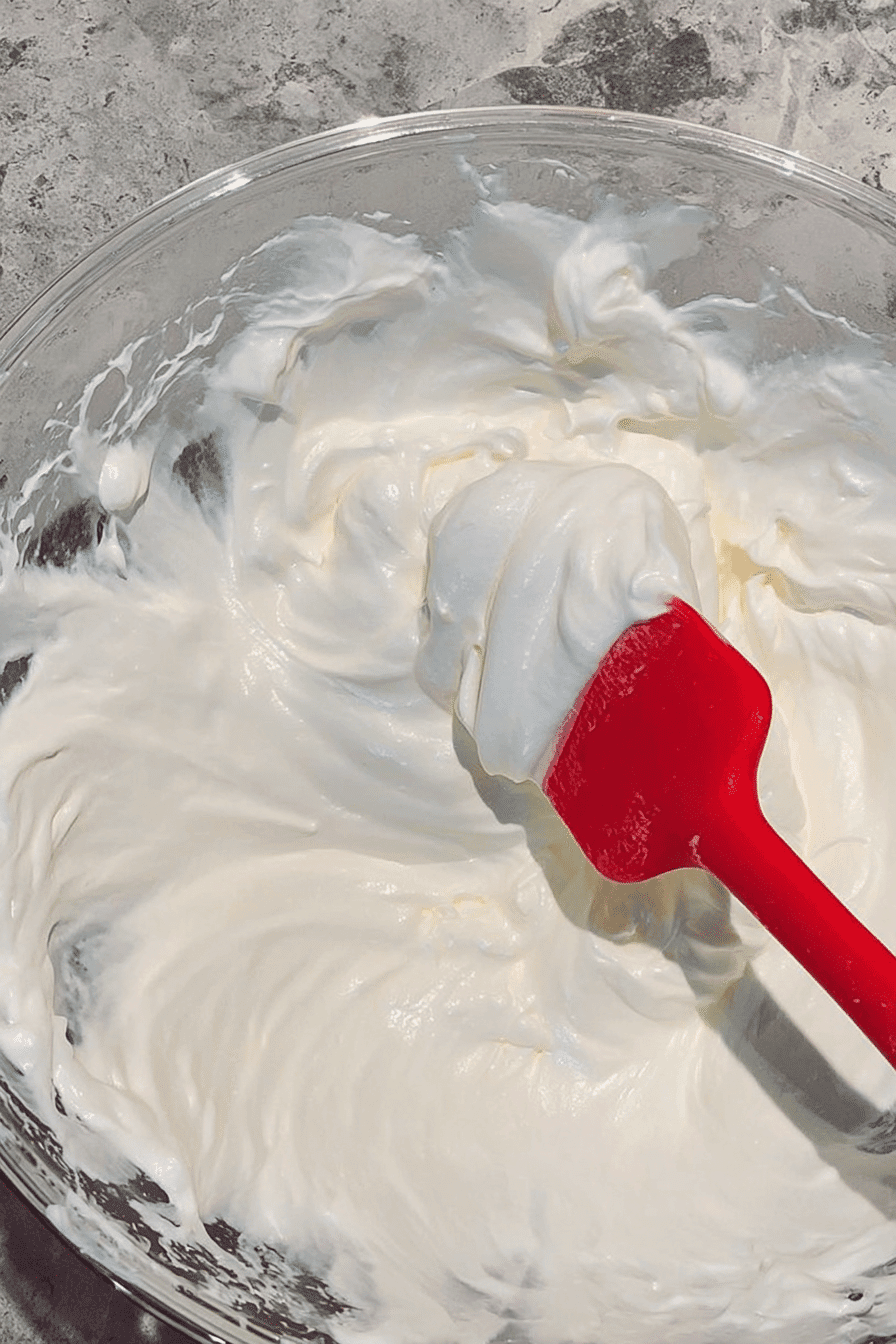
Place butter and marshmallows in large microwave-safe bowl. Microwave on high power in 30-second increments, stirring between each, until marshmallows are completely melted (about 1 minute total).
Stir in green food coloring and vanilla extract until mixture is evenly green.
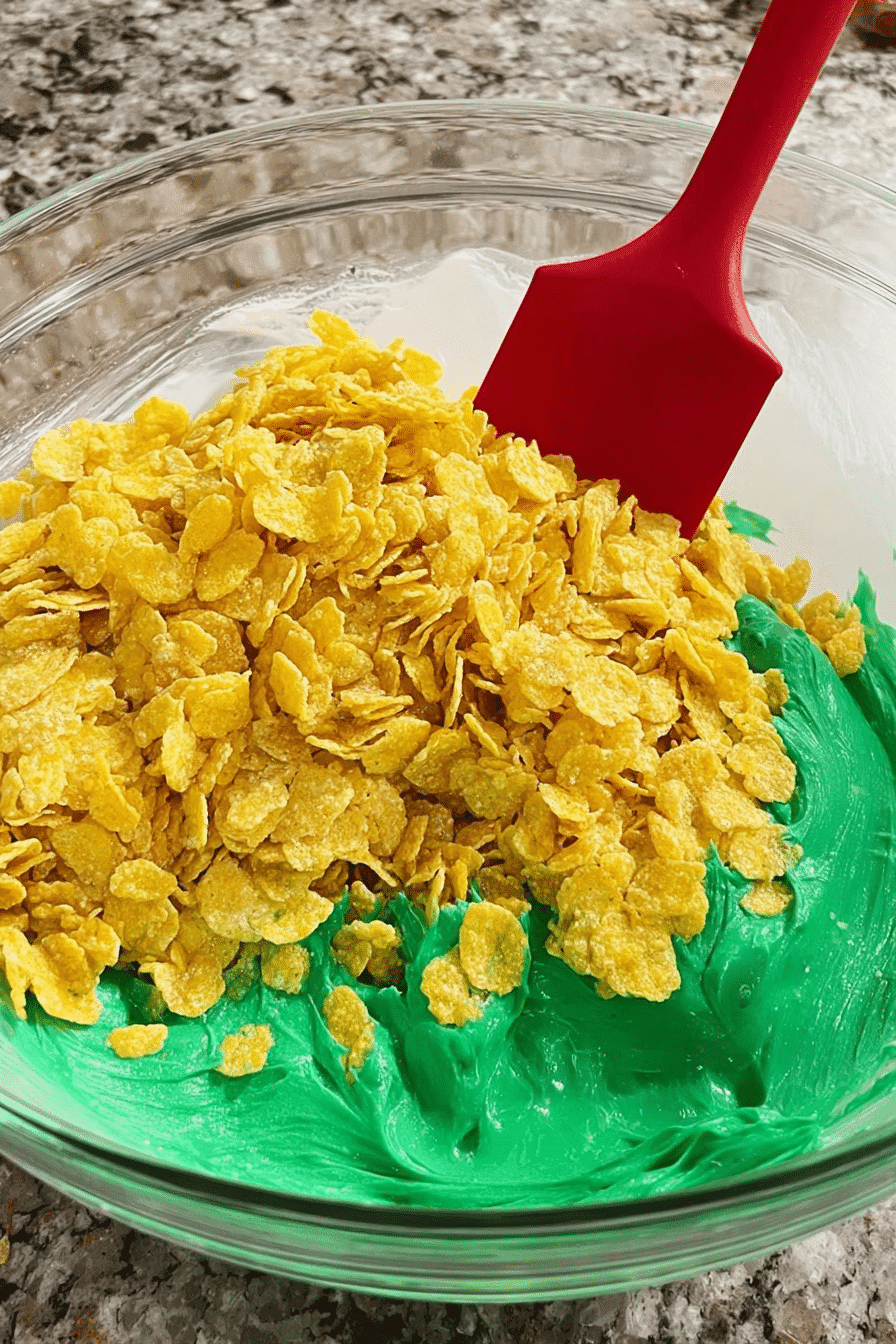
Add cornflakes and gently fold until completely coated with green mixture.
Using greased hands or a cookie scoop, drop spoonfuls of mixture onto prepared baking sheets and shape into wreaths by poking holes in the center.
Immediately press 3-4 red candies onto each wreath to look like holly berries.
Refrigerate for 1 hour until firm and set.
Notes
- Spray your hands with cooking spray before shaping to prevent sticking
- Work quickly when adding candies as the mixture sets fast
- Use fresh marshmallows for best melting results
- Store in airtight container with wax paper between layers
Nutrition
The Simple Ingredients That Create Christmas Magic
One of the things I absolutely love about these no-bake cornflake wreaths is how you probably have most of this stuff sitting in your pantry right now:
For the wreaths:
- 5 tablespoons butter (salted or unsalted, doesn’t matter)
- 10 oz mini marshmallows (about 6 cups, and fresh is key here)
- 1 teaspoon green food coloring (gel works best, but liquid’s fine too)
- ½ teaspoon vanilla extract
- 6 cups cornflakes cereal (not the frosted kind)
- Mini red candies (M&Ms, Red Hots, or those tiny cinnamon candies)
Now, let me tell you about the marshmallows. I learned this the hard way when I grabbed that bag of marshmallows from the back of my pantry – the ones that had been there since last Easter. Stale marshmallows don’t melt properly, and you’ll end up with lumpy, weird-textured wreaths. Fresh marshmallows melt like a dream and create that perfect, smooth green mixture.

My Foolproof Method for Perfect Wreaths Every Time
Getting Your Base Right
First things first – line a couple of baking sheets with wax paper or parchment. I can’t tell you how many times I’ve forgotten this step and ended up trying to pry stuck cookies off my countertop. Learn from my mistakes, folks.
Drop that butter and those mini marshmallows into a large microwavable bowl. Here’s where timing matters: microwave on high for 30-second increments, stirring between each one. Every microwave’s different (mine runs hot, my mom’s barely warms things up), so watch that mixture like your holiday reputation depends on it.
You’ll know it’s ready when the marshmallows are completely melted and smooth. Should take about a minute total, but don’t rush it. Overheated marshmallows turn into cement – ask me how I know!

The Color Magic
Now comes my favorite part. Add that green food coloring and vanilla extract to your melted marshmallow mixture. Stir it really, really well until everything’s evenly green. Don’t be afraid to add more coloring if you want a deeper green — these should look like Christmas, not like they’re feeling under the weather.
The vanilla might seem like a small thing, but it rounds out all those flavors. My mom always said, “Vanilla makes everything taste like home,” and she wasn’t wrong.
Bringing It All Together
Gently fold in those cornflakes, making sure every single flake gets coated with that gorgeous green mixture. Some yellow bits will poke through, and that’s perfectly fine — it adds character. Real wreaths aren’t perfectly uniform either, right?
Here’s my pro tip that’ll save your sanity: spray your hands with cooking spray or rub a little butter on them before you start shaping. Otherwise, you’ll spend more time washing marshmallow cement off your fingers than actually making cookies.
Using a medium cookie scoop or just a regular tablespoon, drop mounds of the mixture onto your prepared baking sheets. Then comes the fun part — use your fingers to poke a hole in the center and shape each mound into a wreath. Don’t overthink it. Rustic is beautiful.
The Holly Berry Finishing Touch
This is where kids absolutely shine, by the way. Press 3 or 4 of those mini red candies around each wreath while the mixture’s still warm and sticky. I like to cluster them together to look like holly berries, but honestly, scattered around looks great too.
Work quickly here because these cornflake wreaths set up fast – especially if your kitchen’s cool. My daughter learned this lesson when she took a phone call halfway through decorating. Half her batch ended up with lopsided berries because the mixture had already started firming up!
Troubleshooting Your Wreath Adventures
When Things Go Sideways
Let’s talk about what can go wrong, because believe me, I’ve been there. If your mixture seems too stiff to work with, you probably overcooked those marshmallows. Next time, shorter increments and more stirring.
Too runny? Your marshmallows might not have been fresh, or you didn’t cook them quite long enough. Pop the bowl back in the microwave for another 15-20 seconds.
And if your wreaths won’t hold their shape? The cornflakes might have gotten stale. Fresh cereal makes all the difference – it should still have that satisfying crunch when you eat it straight from the box.
Storage That Actually Works
Store these no-bake cornflake wreaths in an airtight container with wax paper between the layers. If your house runs cool (like mine does in December), they’ll be perfectly fine at room temperature. But if you keep things toasty, the fridge is your friend.
According to the USDA’s food safety guidelines, foods containing dairy (like our butter) should be stored properly to maintain freshness and safety.
Just remember to let them come back to room temperature before serving – nobody wants to chip a tooth on a cold cookie!
Making Memories, One Wreath at a Time
The best part about these cookies isn’t even how they taste (though they’re pretty fantastic). It’s watching someone discover they can make something this cute in their own kitchen. Last year, my friend Sarah was convinced she “wasn’t a baker” until she tried these. Now she makes them every Christmas and acts like she invented them herself!
These no-bake cornflake wreaths have gotten me out of more holiday binds than I care to admit. Teacher gifts, last-minute potluck contributions, something special for the kids when the weather’s too nasty to go out — they’re like a little Christmas miracle sitting in your pantry, waiting to happen.
The beauty of no-bake treats really shines during the holidays when oven space is at a premium. As Sally’s Baking Addiction notes, no-bake cookies are perfect for busy holiday schedules and getting kids involved in the kitchen safely.
Whether you’re following in someone’s family tradition or starting your own, these simple little treats have a way of making any day feel a little more festive. And in a season that can sometimes feel overwhelming with complicated recipes and perfect presentation, there’s something beautifully humble about cookies that come together in your microwave and turn out gorgeous every time.
So grab those cornflakes, fire up that microwave, and get ready to create some Christmas magic. Trust me on this one – your kitchen’s about to smell like holiday joy, and your family’s going to think you’re some kind of cookie wizard.
Frequently Asked Questions About No-Bake Cornflake Wreaths
Can I make these cornflake wreaths ahead of time?
Oh, absolutely! That’s actually one of my favorite things about them. I’ve made batches up to a week ahead and stored them in airtight containers. They hold their shape perfectly and taste just as fresh. Just keep them in a cool, dry place with wax paper between layers.
What if I don’t have green food coloring?
No worries at all! You can totally skip the food coloring and make natural-colored wreaths. They’ll still look festive with those red candies. Or try different colors – red for poinsettias, gold for fancy wreaths, or even mix colors for a rainbow effect. My kids went crazy for purple ones last year!
Can I use regular marshmallows instead of mini ones?
You can, but you’ll need to cut them up first. I learned this when I ran out of minis halfway through a batch. Regular marshmallows take longer to melt evenly, so add an extra 30 seconds to your microwave time and stir more frequently.
My mixture is too sticky to work with. What went wrong?
This usually happens when the marshmallows got too hot or if your kitchen is really warm. Here’s my fix: let the mixture cool for about 5 minutes, then try again with well-greased hands. If it’s still impossible, pop it in the fridge for 10 minutes to firm up slightly.
What’s the best way to get clean wreath shapes?
Honestly? Don’t stress about perfect shapes! I used to drive myself crazy trying to make them all identical, but then I realized that real wreaths aren’t perfect either. That said, if you want cleaner circles, try using a small round cookie cutter to cut out the centers after shaping.
Can I freeze these cookies?
You bet! They freeze beautifully for up to 3 months. Just layer them between wax paper in a freezer-safe container. When you’re ready to serve, let them thaw at room temperature for about 15 minutes. They’ll taste like you just made them.

